When it comes to flooring options, the variety can be overwhelming. From hardwood to laminate, carpet to tile, each type has its own set of benefits and installation methods. One popular and versatile option is glue-down flooring. This method, as the name suggests, involves adhering the flooring directly to the subfloor using a strong adhesive. In this blog post, we will explore the benefits of glue-down flooring, the installation process, and some tips for ensuring a successful application.
What is Glue-Down Flooring?
Glue-down flooring refers to any type of flooring that is adhered to the subfloor using a specialized adhesive. This method is commonly used for both residential and commercial applications and can be employed with various flooring materials such as vinyl, hardwood, and engineered wood. The primary advantage of glue-down flooring is its stability and durability, making it an ideal choice for high-traffic areas.
Benefits of Glue-Down Flooring
1. Enhanced Stability and Durability: One of the most significant benefits of glue-down flooring is its stability. The adhesive bond between the flooring and the subfloor creates a solid, immovable surface that can withstand heavy foot traffic and furniture without shifting or buckling.
2. Superior Acoustic Properties: Glue-down flooring tends to have better acoustic properties compared to floating floors. The direct bond to the subfloor reduces noise transmission, making it an excellent choice for multi-story buildings or rooms where noise reduction is essential.
3. Versatility in Materials: This installation method is compatible with various types of flooring materials, including hardwood, engineered wood, and luxury vinyl. This versatility allows homeowners and businesses to choose the perfect flooring to match their aesthetic preferences and functional needs.
4. Improved Moisture Resistance: When installed correctly, glue-down flooring provides a more moisture-resistant surface than some other installation methods. This makes it suitable for areas prone to moisture, such as kitchens, bathrooms, and basements.
5. Longer Lifespan: Due to its secure adhesion, glue-down flooring often has a longer lifespan compared to other installation methods. The adhesive helps prevent the planks or tiles from moving, reducing the risk of gaps and warping over time.
The Installation Process
Installing glue-down flooring requires careful preparation and attention to detail. Here’s a step-by-step guide to help you through the process:
1. Prepare the Subfloor: The subfloor must be clean, dry, and level. Remove any old flooring, debris, and dust. If necessary, sand down high spots and fill in low spots with a leveling compound.
2. Acclimate the Flooring: Allow the flooring material to acclimate to the room’s temperature and humidity for at least 48 hours. This helps prevent expansion or contraction after installation.
3. Plan the Layout: Measure the room and plan the layout of the flooring. Start from the center of the room and work your way out to ensure an even installation. Dry-lay the flooring to check the fit and make any necessary adjustments.
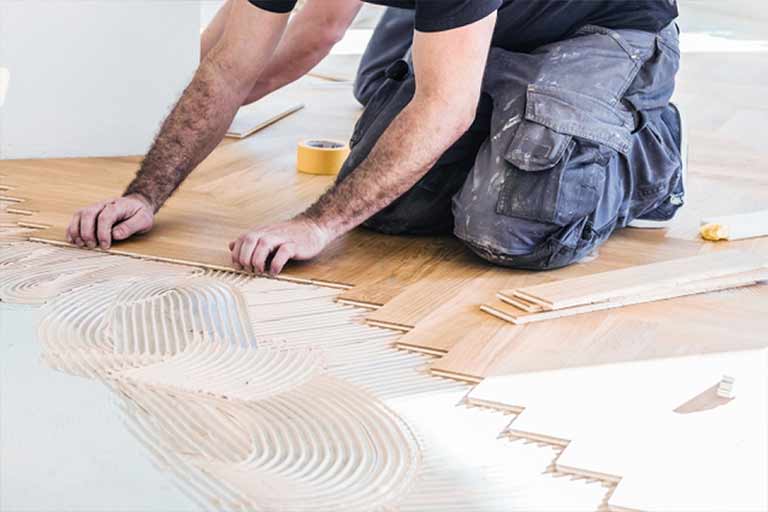
4. Apply the Adhesive: Using a trowel, spread the adhesive evenly over a small section of the subfloor. Follow the manufacturer’s instructions for the correct adhesive and trowel size.
5. Lay the Flooring: Begin laying the flooring material into the adhesive, pressing down firmly to ensure a good bond. Use spacers to maintain consistent gaps for expansion. Continue this process until the entire floor is covered.
6. Roll the Floor: Once all the flooring is laid, use a flooring roller to press the material firmly into the adhesive. This step is crucial for ensuring a strong bond and preventing air pockets.
7. Allow the Adhesive to Cure: Follow the adhesive manufacturer’s recommendations for curing time. Avoid walking on the floor until the adhesive has fully cured to prevent shifting.
Tips for a Successful Installation
• Choose the Right Adhesive: Different flooring materials require specific adhesives. Make sure to select the appropriate adhesive for your flooring type to ensure a secure and lasting bond.
• Maintain Proper Room Conditions: Keep the room at a stable temperature and humidity level during and after installation to prevent the flooring from expanding or contracting.
• Follow Manufacturer Instructions: Always follow the flooring and adhesive manufacturer’s instructions for the best results. Deviating from these guidelines can result in poor adhesion and potential damage to your flooring.
• Use Quality Tools: Invest in quality tools such as a trowel, flooring roller, and spacers to ensure a professional finish.
• Hire a Professional: If you’re unsure about any part of the installation process, consider hiring a professional installer. Their expertise can save you time and ensure a flawless installation.
Conclusion
Glue-down flooring is a reliable and durable option for various spaces, offering enhanced stability, moisture resistance, and acoustic properties. Whether you choose hardwood, engineered wood, or vinyl, the glue-down method provides a secure and long-lasting flooring solution. By following the proper installation steps and tips, you can enjoy the beauty and functionality of your glue-down floor for years to come.